Introduction & Plugin Installation
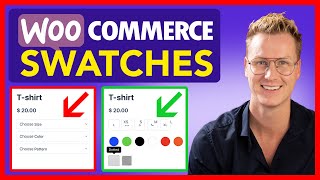
Do you want to upgrade the look of your variation products within WooCommerce from this to something like this? Then keep watching because in this tutorial, I will show you how you can do that using a free plugin. Let's get right to it.
So over here, I have a variable product and based on the variation, the product costs $20 or $25. I click on it. By default, I chose size L, color red and pattern stripes. If I change this to dotted, you see the new version. I can change it to purple and I can change the size. And based on the variation, a new image is displayed over here. Well, this looks really default and we want to make it look better. How can we do that?
We go to the backend, to plugins, add a new, and then I search for WooCommerce swatches. I scroll down and I'm searching for the one from CartFlows over here. If you cannot find it, just hit CartFlows or type CartFlows after that. And there it is. I click on install now. And the great thing is this free version has functionalities that cost money in similar plugins. So this is by far best free WooCommerce swatches plugin. I activate it.
Out-of-the-Box Functionality
And then at once, look at this, I go to products. I see the sizes over here, the variations. So that is what this plugin is doing by default out of the box, but we're going to make it more visual. I want to see a red color over here. I want to see a small striped image over here. But what I like about this is that you see at once, which colors are available. If I click on a product, Look at this, no more drop downs, at once I can click, click and click. So that's out of the box, what this amazing plugin can do, but wait, there's more.
What I've done with this product, if I click on edit product, I went to the variable area, variations and sorry, attributes, and I created three different attributes especially for this specific product. If you already have variation swatches for this specific product, you can go to the swatches tab and give all your attributes a label, a color or an image. So let's say label. Now you can give all the variations of the style attribute a custom label. You can also give them a color like this, or you can give them an image. So if you already have attributes for a specific product, this is how you can assign variations swatches to them.
Creating Global 'Size' Attribute
What we also can do, and that is better, that's so much better, we can go to products here at the left and then to attributes. Over here, I can create an attribute and I can use it throughout all the products in my website. So let's say size, I want to enable this for the archives default. short order, look at this.
This is what's been added by the WooCommerce swatches plugin from cart flows. The size I want it to be a label. So people can just see what size it is and the shape, let's say default. We'll change that later. So I click on add the attributes and now I can configure the terms so I can choose all the sizes I want. So I can start with the smallest one in my website, extra small, then small, medium, and you can say three XL. Great. Or if you want to, you can edit them and say extra extra large, but I prefer to use this update, go back to the attributes. So there they are and that's fine. And then I want to change the order. So three XL over here, let's start with XS, small, medium, large.
Creating Global 'Color' Attribute
Now I want to go to the attributes and create a new attribute. This time it's color. So I say color. I enabled for the archives, but this time I select a different type. This time it's a color and a shape. I want it to be a circle. And then I want the circle to be 32 pixels. I add the attributes. Now I can configure the color terms and I can add a lot of colors.
So let's say black and I can choose a color, black, then white, color, white. And the great thing is you set it up once and then you can use it for all your variable products, red. I want it to be this red, blue, green. So let me fast forward and add all the colors I want to use for products in my website. So that's it. And if I go to the attributes, I see size and color.
Creating Global 'Image' Attribute
So we have a label and we have colors. I want to add one more and that's called pattern. And this time I select an image and the shape I want it to be with rounded corners. Also, let's make this 32. I add the attribute, I configure the terms and then I say striped, upload an image, there it is. add a new pattern and the second one is dot, upload an image, this one, add a new pattern.
Applying Global Attributes to a Product
If I go to all products, variable products and if I used custom attributes, I will remove those three. Let me show you first how it looks. It still looks like this and we're going to make it look better. So I remove all the attributes, save the attributes, then I click over here and I want to go for the size. Look at this, now I can select all the sizes for this specific product. So maybe I don't have a 3XL product for this one, so I don't select it.
I select small, medium, large and extra large for this product. I use it for variations and I save the attributes. Then for the color, I don't use all those colors. So I select red and purple, use for variations and I want to select pattern, I want to select them all. I use it for variations. I save the attributes and now again, I go to variations. Okay. Now I click over here. I say create variations from all attributes, go. Okay. It will be 24 again. Great. I want to give this a price of $20. Now let me update it and then check how it will look.
Linking Variations to Images
Great. S, M, L, XL and those three colors. But now if I select M, red, striped, I see no image. So what I will do at variations, I will expand everything and then once I need to link the right image to the right product. So S, what was it? S, blue, dotted. S, blue, dotted. The next one, S blue striped, S blue striped. So it takes some time, but once it's configured, it's configured for the rest of your life until you change something. So I will fast forward and I will be back with you.
Okay. Now look at this. We refresh the page. I select S purple dotted, there it is. Striped, different color, different size. Now, if I go to the product page, we see everything over here.
Customizing Swatch Appearance Globally
So when we are over here, we can see at once, which colors are available. So maybe see nice dress or nice cap. And then here below, we can see which colors are available, which makes the shopping experience of your visitor better. And don't we all want that?
Well, there is more we can do because, um, here at the variations, attributes, color at it. And I want to make this a square 50. I update it. Look at this refresh. It looks like that here. It looks like that. So let's say 40 around the corner refresh. Okay. Then I go to attributes, this time to the size, edit. I can do the same. I can make it a rounded corner of 40 and also here at attributes, I can go to the pattern, I can say rounded corner of 40, update. Now it'll look like this.
If I think, Hey, I want to change this to small, medium, et cetera. Now let me go back to the attributes, to size and then configure terms. Then over here, I can say extra small, small, medium, large, extra large. And then when I change it over here, it will be changed on all the products where I assigned those attributes. Let me bring it back.
Setting Default Variations
Okay. What I prefer to do, go to edit product to the variations. And then by default, I select a normal size. So there's already something selected so they can see, okay, if I change it to S easily, and then they see immediately what they will be buying. Then they can add it to the cart, view the cart, and then they see what they've bought. So let's go back to the product page.
Exploring General Plugin Settings
It's now all at the left. So I can go to the settings. I go to WooCommerce, variation swatches, enable for a product page. Of course, that is this one. So if I would turn this off to automatically save, refresh bam, gone. Enable for the shop page. So here at the products, I definitely want to use it. So an auto convert dropdowns to labels. So automatically get rid of all those dropdowns and change them into something more appealing. Then the global styling, by default, how big should a swatch be? Well, I use 40. Also here, the border radius, I can increase it. The font size over here, the border color, what color should it be?
What should happen when a certain variation is out of stock? Should it be blurred? Should it be blurred with a cross or should it be hidden? Tool tip, display label over swatches tool tip. So when I hover over this color, I see red, purple, blue. If I turn this off, it will not be displayed. And when we turn it on, we can set it up with those settings over here. And the label position, well, it can be stacked, it can be inline, let's make it really big. And then we see the size, the color and the pattern, the title. Well, of course this should not be that big. But I prefer not to use this, but you can play around with those settings and see what you like.
Shop Page Styling and Conclusion
Maybe it's not so bad after all. And do we want to enable swatches for the WooCommerce filters? So there's a widget with filters, and if you want to, do you want to enable those? Yes. Then we go to the shop page styling, really important, the swatch alignment. Right now, my product page, the title is in the center, so I want this also to be in the center. So I can say bring it to the center, like that. Swatch position after the price, before the price, before the title. I like it where it was, for the title. Show swatches label, so again you see what it is. You need that, I think it's pretty self-explanatory, hard word. Attribute limits, if you have 20 colors over here, how many do you want to show? So if I would say I only show two. You see two options of everything, and if you click on more, then you go to the product page. So you can decide what you want to have. If you say zero, they will all be shown. Overwrite global settings, overwrite the global settings for the shop page. Yes. We can change things over here and that will be overwritten on the shop page. So you can give everything a specific size. I turn it off. I'm okay with how it is. And if you want to learn more, you can click over here. So products over here, we can see what we have, change everything based on images, colors or labels, and then we can add it to the cart and it will make the whole shopping experience better. Thank you for watching this tutorial. I hope it was really helpful for you. If you want to learn more about creating a webshop using WooCommerce, feel free to check out my tutorials. Go to youtube . com and search for Ferdy Korpershoek WooCommerce, and you will find the best tutorials on the planet, I think on all planets about WooCommerce. Have a great day. Feel free to like this video and subscribe, and then you will see more videos about WooCommerce, about WordPress, affiliate marketing, and sometimes something else. Bye-bye.