Introducing Twenty, the Open Source CRM
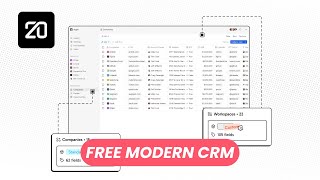
A modern, powerful, affordable platform to manage your customer relationships. This is how Twenty is presenting itself and it perfectly describes it. Let me present you a free open source CRM with nearly 10,000 stars on GitHub: Twenty. It's a great alternative to PipeDrive and Salesforce with additional features and full control. You can define data models, use APIs, and in the near future, connect existing data sources such as Stripe and Pulg.
And on top of that, a neat UI with a great user experience, including tasks, views, notes, and an incredible search bar. Before diving into the platform overview, let's see the different options available to use it.
Installation and Setup with Elestio
You can use the cloud version of Twenty priced at $9 a month per user or self-deploy it yourself on your server by following the installation guide on their GitHub repository. Together, we will use our platform Elestio to install it on the cloud provider of your choice or on your own server, while we take care of doing backups, updates, and maintenance for you.
To install Twenty with us, head to elest.io and click on login. Then click on create a new service, search for Twenty, click on select. Choose between the different cloud providers. I will choose Hetzner. Adjust your region and service plan based on your needs, and then click on next. Adjust your level of support; I will keep the free included one. Change the admin email of your password if you need to, and then click on create service.
Once your installation is finished, you receive an email. Follow the link to get your password. Then click on that icon to copy the password of your admin dashboard and follow the link for your instance.
Initial Workspace and Profile Setup
Welcome to Twenty. Continue with email. The email is your admin email address. Continue and paste the password from your clipboard, and you're ready to go. Sign in.
Now we need to create our workspace. It's related to your company, to your business, to what you're doing. Let's upload our logo and then the workspace name. So, LS. Continue. Now our workspace is created. We need to create our member profile. I will upload my picture and some notes, and then first name, last name, and continue.
Exploring the Default Data Structure
We end directly on Companies, filled with data because it's a ready-to-use CRM template. We have full control of everything, we can adjust it, but for now we'll just browse the existing data they provide us. There are companies, we can see they have a name and a logo, a domain name, we have a link icon, creation date, number of employees, some additional data too.
Then the second data set we have is People. It contains their name, the email of the people, and if they are related to a company. By default they are not attached, maybe for simplicity, but you can assign them a company. And again some additional information with a phone, creation date, city, different social links. And the last one is Opportunities with a nice Kanban view, but we will skip it for now.
The Power of Universal Search
Before creating other data sets, let's just have a look at the search bar. It's a very nice feature they have. It's a very advanced component that you can find in modern applications. Instead of opening like people and using a search bar and searching within people data or within companies, you can use the search bar, and there is even a shortcut to open it. From there you have access to all the data. So you have easy action to do like gp it will open people or you can do gc to open companies. But once you type within it, you have access to all the data from your instance. So you know you're looking for data about Dylan, you go, you click, and you have access directly to it. But let's not spoil that view for now.
Building a Custom Data Model: "Actions"
And let's go to the settings and create a new table. Go to Data Model. Here you can see the existing table or objects you have: Companies, it's a standard type with 14 fields and five instances. Instances is the number of objects inside, the number of rows. People, and Opportunities. Let's create a new one.
So click on Add object, and let's say we want to create additional data based on our CRM. So let's name it Actions. So here it's singular, so singular is Action and the plural name is Actions. You can choose a different icon, let's do this one, and let's say 'actions to be taken' and save.
It created our new object, and within it has by default a creation date, different activities, attachments, events, and a name. It's the first column. We'll see later what is activities, attachments, and events, but every object when you use Twenty has it.
Defining Relational and Select Fields
So when we have an action, we need extra data. So let's add a field, and we need someone in charge to do the action. Let's say it's a team member of someone using Twenty with us. So team member, can choose a different icon but this one is perfect. Team member in charge of the action. The type here is not a text, we want a real reference to the team member. So we need to go to relation, and you can see we have a lot of different types.
Relation, so what do we want to relate it to? It will not be related to a people, because people are people from the company, and here we want people from our company, so team members. It's workspace members. Currently there's only me, so it will automatically preview it with me. And currently the relation is in the wrong way. So one action has multiple workspace members, we want the opposite. So belongs to one. We want the action to be related to one workspace member. And then on workspace members we will have the reverse relation, so we need to name it, let's say Actions. But we don't have view access to workspace members I think so for here it's not so important. Now you can see on top we have team member.
Let's add another one. So, another relation. This one is Company. So to which company it is related. I'm just using a random icon. Company targeted by the action. It's again a relation, it's again in the opposite side, and the object destination. So it's all the different type of object you have in your Twenty instance. This time it's a Company. And on companies it will create a new column for the opposite side of the relation. Let's name it Actions and save it.
Our example data is almost finished. Let's add another field. So let's name it Result. So what was the outcome of our action. Let's take one, two, three. Outcome of the action. The type, we could make true or false or a drop down with a select and we need to define the different options available. So if it's a success, if we had no answer, no reply to whatever intended action it was, and if it failed, we had something not approved or denied. We can adjust the colors and hit save.
Adding and Viewing Custom 'Actions' Data
Now our new data model is ready. We can leave the settings and on the left, now in our workspace we have access to Actions. The UI is very nice with the animated icon here. And you can see we have name, creation date, and result. So we are missing our other column. This is by default. The view that we have here was created with this, so it sticks to this so it doesn't impact your past views. We just need to add the column to this view. So we want to add also the company and the team member. Let's create our first action. Add an Action.
So here we can fill it directly. So the name of the action, what did we try to do? Tried selling a hosting solution. When it was? Now. The result, it failed. And the company I tried to do it was Figma and associated team member is me. So currently there's only me on the instance but you would have the complete list of who is present in your team. Let's add another role. You can hit the plus button here. And let's say: 'Send the contract with DocuSeal', which was our last week video. Creation date again, let's say I was very productive today. Result: no answer for now. The company, it was to Stripe, and team member again, it's me.
Creating Custom Views and Kanban Boards
Let's create a different view to see all our actions, all our data here. So here, it's to open the view panel. We have All Actions, it is locked, because we can't touch the default view. We always need a view. And we can add another view. Let's name it 'Action to redo' if we had no answer. View type, it will be a Kanban, and the stages it will use, it will use our dropdown, so the result column, and click on Create.
Now we have our three columns, but we don't want to redo every action, only the one with no answer. For this we can apply different filters. So we want to filter if the result is 'no answer'. So now we have only 'Send the contract'. We can cancel our filter with reset or save it with Update View. And when we want to know what we have to do, we just open that view. We have all the list of the no answers so we need to perform an action again, do it, and either swipe it to success or failed. Let's say it was a success. It disappears because it's not in that filter anymore. Now we can go back to the all actions and you can see that this action now is in success mode. You can apply other filters here, sort your data based on different things, for example the name or the result. You can also import data or export data into or from a CSV file.
Record Deep Dive: Timeline, Notes & Tasks
Let's open one row of our data. So you can click on here, and you have that nice view from one row of your data. So it's not just a row in a table, it's a full object containing all the data. You have a nice overview of it. So the title, creation date, the result 'success', you can edit within here. You have the company, the team member associated to it. And on the right you have that interesting part now. Here you have the timeline of what has been done to that object. Currently it's empty.
So let's open for example Notes. You will say what you did about it. So let's name it 'Contract Written'. And you have a full markdown editor here. So you can do 'Heading', 'Hello, this was the contract'. Perfect. It's attached by default. You can add multiple notes, add files to it if you need to upload the PDF maybe of the contract. And if you go to timeline, you will see every action that has been done to that object, so you have a clear overview of who did what and when.
And let's say the result wasn't a success, maybe it failed. So you would add another task, a subtask based on this. Let's say 'Send the contract with updated details'. So maybe there was an issue and we need an update. When do we need to do it? In two days. You can add extra data again with the nice editor here, which is quite powerful and has like a Notion-like appearance. The list of the changes you must do: Change A, Change B, and so on. Let's leave it. It's here in our task, but you can also open the task view here and you have a nice overview of all the tasks that you have within your Twenty instance. Currently we only have one, but you can imagine if you have a whole team working together. If you are the team leader you can view for everyone, but if you are just a team member you can filter based on who you are or who you wanted to see the data from. And because you are working hard, you do your task, you check it, and mission accomplished.
User Management, Integrations & APIs
But because for now there is only me on the instance, let's see how we can add other users. So let's head to the settings part and jump to the members section. You can copy the link, send it to your team members, and they can sign up following that link. There are no advanced customization options, but you can still change the appearance with light or dark theme. By default it's based on your system settings, so if you are in dark mode you would see dark mode.
To go further with your data you have multiple options. The first one is to enable integrations. So soon they plan to do Airtable and PostgreSQL, but they already have Zapier, so you can integrate with almost everything. The main difference is you would have the cost of Zapier while if they do their own integration it would be free. And if you need to go further and things that are not automatable within here, you can go to the developer sections, get your API Keys, plug some webhooks, and read the documentation to see what is available to do. I will put you the link in the description but you can see it automatically generates a REST and GraphQL API to communicate with your data.
Final Thoughts
Thank you for watching. We hope you enjoy discovering Twenty with us. If you find our content useful, please hit the like button to make our content more visible to other open source lovers. Don't forget to subscribe to not miss our upcoming platform overviews. In the meantime, you can continue your open source journey with this video here.