Introduction: What you'll learn
What's up guys, there's Claudio from Visualmodo WordPress themes. In today's video we're gonna learn how to localize your WooCommerce store. We're going to learn how to display the shop prices on your WordPress website in different currencies according to the localization of your customer. For example, in this store the prices are displayed in US dollars but located in Brazil so it should show the amount in Brazilian reais. How to do this and change it according to any possible customer location is what you'll learn here. Before I start please take a moment to hit the Subscribe button, like this video, and share this content with a friend of yours. You have no idea how much it helps us. Okay, let's get started.
Preparing WordPress and prerequisites
First of all go to the WordPress dashboard. Always restart the video on the dashboard to make it equal for everyone and let's review the left side menus. Into the left side menus we're gonna go to Plugins and Add New. But before we continue make sure that you have the WooCommerce plugin active and you have some products on your store so you can have this look on your website already. Because we're gonna be installing WooCommerce Price Based on Country. Into the upper right corner field we're gonna search for "Price Based on Country for WooCommerce." This is the plugin by Oscar Gare, thank you guys for your great plugin. So click on Install Now.
Activate plugin and allow diagnostic data
After installing click on Activate. The plugin will direct you to the plugin page and here we go into the plugins list of our WordPress website. The very first thing you need to do is allow the plugin to collect non-sensitive diagnostic data and usage information to improve features and functionality. You must allow this to make it work. After this we'll be able to see the getting started guides or go to the settings. We're going to move to Settings.
Enable WooCommerce geolocation
As you can see WooCommerce needs geolocation. Set default customer location. Click right here and this will move you to the WooCommerce settings. Under the General tab, scroll down a little bit and in General options you can see Default customer location. Select 'Geolocate' or the full customer location option. Let's save changes.
Open the plugin Zone Pricing tab
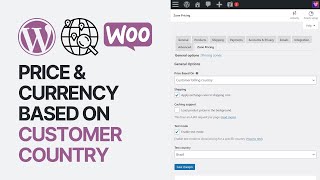
Now you will see a message at the top of your WordPress dashboard, but we will use the General settings page. After this we're gonna move to the new tab that appears in the WooCommerce settings as soon as we start the plugin. That is the 'Zone Pricing' tab. Here you can choose price based on consumer billing, apply exchange rates in shipping cost, and other options. Let's save changes. Now we have a new option called Pricing Zones.
Create a pricing zone and set currency (example: Brazil)
Let me go to Pricing Zones and now I can select some pricing zones, for example Europe or America. This zone is gonna be called Brazil. Select the country. The currency is going to be BRL, Brazilian real. One dollar is almost like six, this is just an example. It's five and some change but let me use a real number. Save changes. Now we have one pricing zone, it's already set and working.
Test mode and customer behavior
Now we can enable the Test Mode to see the location. Let's test the country for example Brazil. Save changes. Now let's review. As you can check, if you are in Brazil this store will display prices in BRL, in Brazilian reais. So a product that should cost one dollar will now appear as that local amount. Simple, easy and effective. If the product does not appear properly set, normally as soon as the customer adds the billing information or the shipping information the price is going to be updated on the checkout page. So no need to worry, but it's always good to do some tests. Moreover, and this is a nice tip, they have a widget to let customers change the currency based on their location so customers can input their own location. That is friendly with multilingual plugins. I can explain this in another video, but for this one I think it's already good to go. You already know how to use the plugin and already see it's working, so it's worth a try.
Extra resources, themes, and closing
If you have any questions use the comments below. If you need more widgets, elements, templates, tools, or pre-built websites you can import with one click go to the WordPress dashboard Plugins, Add New, and search for Visualmodo WordPress plugin—it's completely free. For a free WordPress theme go to Appearance > Themes and search for 'Zoo' WordPress theme, click install and activate. You'll be amazed at the customization options even in the free version and it gives you more preview websites you can import with one click. For premium options and full support visit visualmodo.com and purchase the Visualmodo Pass. I hope you enjoyed this video and I see you tomorrow. All the best.