Introduction and purpose
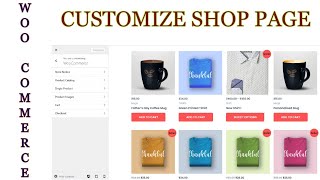
Hello and welcome to WooCommerce plugin series of quick tips. In this series of videos I will show you all the details about WooCommerce plugin to create ecommerce website. If you are new to my channel then do subscribe to the channel to get the quick tips on website design, search engine optimization and social media marketing tools. So let's start with the video. So in this video I'll show you how to customize the WooCommerce shop page.
Opening the Customizer and Store Notice
So right now I'm on the shop page of this dummy WordPress website which is using WooCommerce plugin and I am already logged in to the WordPress dashboard of this website. So this is the shop page of this website and you can see that these products are listed on the shop page. Now we can make changes to the appearance of this shop page. So let's see how to customize this shop page. Now I am already logged into the WordPress dashboard so I can see this Customize option here. So click on Customize. All right, so now we are going to customize this shop page. Scroll down and you will see the option WooCommerce. Click on it. Now here the first option is Store Notice. So this is the store notice. If you want to put any notice on the shop you can enable this option. Click on Enable. All right, so this is the notice that will be shown on the shop page. You can change the text here.
Product Catalog: Display Modes
All right, now let it disable. Now let's go back and here you will see the option Product Catalog. Click on it. Now you can see that it shows Shop Page Display and it is showing products. If you want you can change it to Categories. So when you change it to Categories it will show only the categories on the shop page of this website. Let's publish it and see how does this look. Okay, so all the categories will be shown here. Now you can change these images. These are the default images. You can change the images for the categories also. Now let's go to Dashboard, go to Products then go to Categories. Now I'm going to set up an image for this Affiliate category. So click on Edit and here you will see the option to upload image. I'm going to take from the Media Library. Select and click Update. Okay, so this is the image that I have assigned for the category. Now let's refresh it. Now you will see the image for this Affiliate category. So this is how you can set up the images for the categories also.
Showing Categories and Products together
We can also select Show Categories and Product. So it will show the categories first and then it will show the products. So let's change it back to Show Products. That will look nice on the shop page. But if you have a big website with many categories then you can select the option Show Categories and also assign images for the categories. Category Display: Show Products. So when you go to any category, let's see, let's go to one category. All right, now I'm going to one of the categories: Services. So if you have subcategories then you can select Subcategories and it will show the subcategories. If you do not have subcategories then you can select Show Products. So whenever someone clicks on category it will show the products under that category. All right, so leave it as it is. Let's go back to Home and let's go back to Shop page again.
Product Sorting Options
This is the default product sorting. Right now it is set to Default Sorting. You can change it by these options. Average Rating: it will show the good rated product at the top. You can also sort by prices and you can also select Most Recent. So the product which is added newly will show at the top. Let's check it. Click on Publish. Let's go back to Shop page and refresh it and you will see the latest product at the top of the shop page. All right, so let's set it back to Default Sorting. Now people can sort from this option. Let's see here is an option to sort the products, so people will be able to click on this option and sort the product using these options. I'll advise you to just keep it as Default Sorting.
Layout Width, Products per Page and Columns
Now Default the Shop Archive Content Width, so it is not of any use. If you want you can change the width of the content. So this is how it will reduce or increase the width of the content. So let's set it back to Default. Now how many products you want to show on the shop page? Right now it is set to nine. So let's change it to 24. So 24 products will be shown on the shop page. Now this is the number of columns. Right now it is set to three. We can change it to number four and you will see four columns. Let's publish it and see how does this look. Right now it shows three. Refresh it. Now you will see the products in four columns. So this is how you can adjust the columns of the products.
Shop Product Structure and Visible Elements
All right, now this is the Shop Product Structure. So this is the shop product and this is the structure. You see the category then title then ratings and then price. Category, title, ratings and price. If you want you can disable any one of them. Let's disable ratings. Simply you can click on it and it will stop showing the ratings of the product. You can also change the position. You can make the price at the top. So it is now price, category and the product title. Now here are the other options. If you want you can show the short description also. So I'll just disable it. And if you want you can show the Add to Cart button also. So people will be able to add this product to the cart directly from this page. Let's publish it and see how does this look. Refresh it. Now you will see Add to Cart button also. All right, see I can add directly to the cart from here. Okay, so the product is added to the cart. All right, so this is how the product catalog works.
Single Product: Breadcrumbs and Images
Let's go back and click on Single Product. Now disable Breadcrumb. This is the only option here. Let me show you. Okay, so this is the breadcrumb of this product. If you disable it, it will go away. So this will be useful if you have many products and if you have many categories then people will be able to go to that category directly from this breadcrumb and you can click on it and you'll go to the category. All right, now the next one is Product Images. So I guess the default settings are good for product images. If you want, you can change the size of the product image also.
Okay, now this is the Cart option and here you will see Enable Cross Sales. If you're not aware of upsells and cross-sells then you can check my other video where I have explained the upsells and cross-sells also. Now this is the cross sales. Okay, now if I disable it and publish it now let's refresh it. Okay, now the cross sales product is not here. All right, so this is how we can enable or disable the cross sales from here. So this is the last option: Checkout. You can make changes to the checkout form. Now you can see the company name here is the company name. It shows optional. If you want you can hide that option. So the company name will not be shown on the form. These two options are required and mandatory. Now if you want you can disable this option also, the second line address. Right now these are the mandatory options. Phone field is required. You will see the phone field is also required. If you want you can make it optional and it will show this option. So if you are setting up the shop then I'll suggest you to keep it required.
Privacy Policy, Terms and Final notes
Okay, now this is the Privacy Policy. You will see the link here, the privacy policy. If you do not have any privacy policy page created then create a page then you will see the option here to select that page. Okay, now this is the Terms and Conditions page. I'll set this page, Return and Return Policy, and you will see the changes here. Okay, so this is how they will have to click on this option. They will have to check the box so that they will confirm that they have read your terms and conditions. Now you see this privacy policy short description. You will see it here. This is the option here. You can make changes if you want to make changes to this data you can change it from here and this text you will see here. All right, so this is how you can make changes to the shop page of the WooCommerce website. Thanks for watching. See you in the next video. Do not forget to subscribe to my channel to get more quick tips about online softwares and tools. If you have any questions please leave us message in comment section and press the like button if you like the video. Thanks for watching.