Introduction & Channel Overview
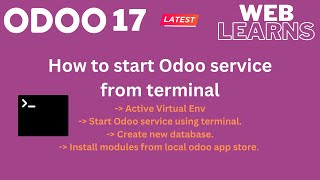
Hello Community, I hope you are doing good. In this discussion, I'm going to show you how to start Odoo 17 service using the terminal. In case you missed the previous discussion about how to configure Odoo 17 in Mac OS, please check, the link is given in the description. And if you want to learn more about Odoo, you can visit the WebLance. Under the home screen, you can see Odoo development playlist available. And once you click here, you can see different types of playlists available with the different topic-wise with the real test cases. Source code also available in the GitHub, make sure you can follow that link.
And one more thing is in our upcoming session, I'm going to show you Odoo 17 all the topics from the scratch. And here you can see this Odoo development, it's a mix of Odoo 14, 15, and 16, but now our new series I will also launch which is Odoo 17 development. All right? And meanwhile, I will also cover the POS, website, and which is not yet discovered all the topics I will try to cover. So stay tuned with me. If you didn't subscribe this channel, please subscribe, it will motivate me. So let's back to our main topic.
Activating the Environment & First Run Attempt
So here first thing is, so I already cloned this version 17 right? In our last session, you can see here in the desktop, you can see this one, Odoo 17, which is the community version. Right now I will show you. And first thing is how you can start Odoo 17 using the terminal.
Might be you already know how to create Python virtual environment and inside the environment how you can also set up Odoo, right? So in a previous discussion, I already created a virtual environment plus Odoo 17 setup. Okay?
So first thing is I will try to active this Python virtual environment. Odoo17_env/bin/activate. And now you can see right now we are in virtual environment.
And now once I will go to here and write python, right? So if you are using a multiple Python versions, right, so don't worry, because once you create a python environment, you already mentioned which python you are going to use, right? So simple, I will use here python 3.11. For your information, Odoo 17 is using the minimum python 3.10 but here in our case I'm using the little bit higher version, Python 3.11. 3.12 is also launched, you can also use that one, that is no worries, right?
And first thing is I'm going to the desktop, Odoo, and once I click to ls, you can see here the default Community add-ons and all the stuffs available here, right? I just cloned from the GitHub. Now I'm going to use like python and once I click here enter, so you can see the Python version, right? Let me exit from this terminal.
Fixing the Addons Path & DB Credentials
And here I'm using odoo-bin. Here guys, you have to remember one more thing if you are using a multiple Odoo versions and different Python versions, right, so you don't need to use only like this python odoo-bin. Because right now in my case, I'm also using, and once I click here you can see it's already activated like this, but I'm also getting some error, right? And here you can see by default it's using the RPC configuration file by default from my home directory. All right?
So here you can see it's using Odoo 15 addons path. Right? In our case, we are using the higher Odoo version. So due to that, it's having some such kind of issues, let's say the db-filter error and whatnot. Right?
Here the thing is, my advice is you can use addons-path here in the terminal: odoo/addons and addons. So if you are going to here in the folder, right, so this Odoo under this addons, right? This is the base module of the Odoo. It's having all the basic modules you can see here including these modules. And outside of this Odoo, you can see this main Odoo folder and in this folder, you can see it's having all the community add-ons. Right?
So due to that, I'm using here these two, which is compulsory. Yeah, another thing is if you're using only addons, that is also fine. It will automatically use addons dash slash addons directory. But in our case, you are as a developer, so you don't need to forget about these two. All right?
And here I'm using here my own Postgres user and password to interact with the Odoo. Okay, so for that I'm using -w weblance -r weblance. Right now you don't need to worry about this command, this command, as well as this command, what is it? Right? In our upcoming session, I will explain you everything.
Reviewing Startup Logs & Accessing the UI
Once I enter, so here you can see some deprecation warnings available here, right? You can just ignore this one at the moment, but you can see here we are using the Odoo version 17.0. By default configuration file is in the home directory which is .odoorc, which is a hidden file if you are using Mac OS or the Ubuntu or any Linux operating system. In the home directory, you you can also see this file while you are running the Odoo service in your local system, until unless you are mention the specific configuration file it will use only that one. So this is the default one, okay. Another thing is you can see here, this is the service name we have to use, right? And by default 8069 is the port number to access this Odoo service. So for that I'm going to here in this browser, I will use here 8069, right? And once I press the enter you can see it will redirect me in this main localhost/web/database/selector. And here we don't have any database so Odoo automatically render this template.
Creating a New Database
And this is the master password, right? So this master password we have to save and we have to keep this password. So while you create or let's say create a database or let's say restore the database or delete the database you need this master password, and that master password requires here. So by default is this one. So this is the first time you are configured, during that time it will automatically available this password message. Otherwise, we have to manually write down this password.
Okay, here I'm using like odoo17_test. I'm using here email as an admin, as a user password is a user, right? So here I'm going to add also password, the phone number it is required. The language, and here I'm using the India as my country. And I will also select the demo data. So once I will click to this demo data, it means like while I will use any applications, any modules in the Odoo, it will automatically also create some dummy data for me. So once I click to here the Create Database, it will create a new database in the Postgres side, which name is the odoo17_test.
Okay, so right now I'm using the Safari browser and in the Safari browser version 17 having this kind of issue. So if you are using the Safari, please switch to another browser. So here I'm going to use the Chrome browser, right? Let's say the localhost:8069, admin, and password is also admin. And now you can see it's redirect to the App Store.
Installing a Module & Exploring the App Store
So this is the fresh database we created. Right now I'm going to in the settings. I'm going to down and I will try to active the developer mode. And now you can see the module name is displayed here. Okay, right now I'm trying to install the Contact module. So you can see it will automatically redirect to this into the home screen in the discuss application, right?
And once I will go to here, so those are the main applications, right? Sales related, CRM related, stock related. You cannot see here the stock related different modules, but in the submodules you can see stock related modules. So here you can see only the applications module. And once you remove the filter, you can see all the modules, right?
And please guys remember we are using the community version. So here you can see such button, right, upgrade like this. So those are supported in the Enterprise version, which is the paid module. If you have access, it's good, you can use that addon path also. If you want to use any specific module, you can just install. So you can just click to this "Active" and it will automatically install the modules.
So if you are going to the backend side in the terminal, you can see the dependent modules automatically install. You can see the portal, digest, payment, right, the analytic, the product, those are the modules. So resource, onboarding, so those are the modules, right? And it's automatically installed in the backend side. And as a front-end side you you can see the progress and once done, it will refresh the Odoo page and it will redirect to the first menu. The first menu is the Discuss menu here.
Exploring Demo Data and UI Views
And now I'm going to in the Contact, and if you remember we already, while we create this database, the new database, right? We tick mark the load demo data. So those are the demo data you can see here. Here you can see this is the kanban view, this is the list view, this is the activity view. Okay, so once I'm going to here, you can see the form view. You can see the tabs, the chatter part, right? In the configuration, you can see different predefined, pre-loaded data also available here, not only the Contact but in the sales, the invoice, product, report, right? In the report, you can see like this. Then after the dashboard, invoicing, the link tracker, and this is the main settings for the admin user.
Conclusion and What's Next
All right, so I hope you have a good understanding about how to activate Odoo service using the terminal, right, like this. How to install the existing modules from the Community using this App Store. You can also add your own apps in this App Store. I will also explain how you can also register our custom add-ons, right, modules, in the App Store. I will show you in our upcoming session. All right? And the last one, like we already learned like how we can create a new database. All right? So if you have any doubt related this topic, please comment below and see you in our next session. In our next session would be how you can, introduction about the CLI commands.