Introduction to ERPNext and This Tutorial
Hello! Welcome to Frappe Academy!
If you’re a new user who has just created an account in ERPNext, you must be wondering how to get started? In this video, I am going to show you how to do a basic ERPNext setup, in under 10 minutes.
By the end of this video, you will have the basics of your business recorded in the system, and you should be ready to record your first Sales and Purchase transactions as well! For those of you who are new to ERPs, an ERP is basically a virtual representation of your company in a software system. ERPNext is a 100% Open Source ERP. It is a multi-dimensional software that helps you to manage your end-to-end operations.
Not only this, there are several industry-specific domains like Manufacturing, Healthcare, Retail, Education, Services etc., that provides you with a skeleton with which you can map all your processes.
In this video, we will follow through the journey of my hypothetical manufacturing company, Frappe Furniture which is a budding furniture manufacturing and retailing company and set up my operations in ERPNext.
Understanding the Dashboard and Document Types
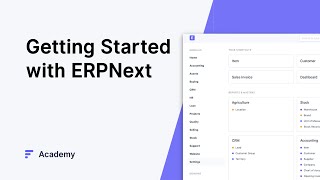
The moment you log in to your account, you can see a dashboard with different cards. These cards are our modules, like Accounting, Selling, Buying, Stocks etc. I will begin with the Getting Started module.
You will also see that each of the modules has various documents within them like Company, Chart of Accounts, Items, Customers etc. These documents are your information carriers, that hold the data about your company and business in the form of fields within. These are grouped under different sections and denoted by different colors. Blue or orange in this case.
The blue-colored documents are called the masters which will be required to carry out all your operative transactions. The orange ones are the documents where no records are created.
Setting Up Your Company Profile
Now let’s go to Company. Based on the details that you entered when you signed up, a company would have been created already. Your default currency, country, and bank details would have been added.
You can also create more companies if you wish to; all these companies would be enlisted here and each company can have it’s own Transactions, Chart of accounts, and even its own currency! Just so you know, ERPNext also offers multi-currency transactions and it is super easy to manage that!
Exploring the Chart of Accounts
Now, going back to our Getting started Module, let's go to the Chart Of Accounts. Chart of Accounts is a visual of all my company ledgers, based on the double entry accounting system. Here, on top, you can select the company for which you want to see the Chart of Accounts.
As defaults, you would have some accounts created already as per the Financial Standards, represented in a tree kind of structure, with different branches. You can call these folders, group nodes; and the branches can be called leaf nodes. The tree View in ERPNext allows the creation of nodes with a single click. You can either go to each folder and see the account, or just click on “Expand All” from here.
Now, we can see that an accounting ledger has been created for every kind of transaction that you would want to have in your company. The balance & currency is also indicated here. Now that is a pretty good start! If you still wish to create a new account, you can do so by clicking on New or you can open individual ledgers and view them. On opening this ledger, you will be able to Update the Account Number or Name, Merge this account with another one, Go to Chart of Accounts, view the Ledger, or Convert this to a Group account.
Creating Your First Item
So, now that I have my company created, my Chart of accounts are in place, all I have to do is some business! I will now create an item that I am going to sell. It can be any product or service that my company offers. So let’s go back to Getting Started and click on Item and create a new record.
Now, remember that whenever we want to create a new record in items or any other kind of master, a Quick Create window will pop up where you can add all the basic details. If you wish, you can also select the option of “Edit in Full Page” to add more information.
Now, coming back to items, add the item code if you already have one. Since I don't, I will just make one up and add it. Now let's add the Item name as Classic Wooden Wardrobe. You can select the item group from the given choices or create a new Item one; I am selecting Products as my group here. For me, the opening stock of Wardrobes is 500 units and the standard selling rate is 10 USD! An Extremely affordable wardrobe, do buy it if I have a real furniture company someday! In the same way, add more products, raw materials or services that you offer or even buy!
Adding a New Customer
Now that I have money and items for my trade, let me see who I can do the business with. I will have to create a customer for this, let’s say Tranquil Hotels and now let me capture their details in here.
So let me add the Full Name, the Type of Customer, it could be an individual or a Company, Customer Group, you can select amongst the given options or create your own, I am going to keep this as the default, All Customer Groups, and then I am going to select the Territory.
You can add the contact details of the customer; their Email Id, Mobile Number, and their address. You can also add multiple addresses for each customer. Once you are done, save this customer!
Adding a New Supplier
Now I have the item, I have my customer. Let us also create a supplier in a similar fashion. I have a supplier who supplies the Plywood for my wardrobes, so I will add them to my Supplier List.
Click on New, add the name of the supplier, Select a supplier group, as to what kind of items are they supplying to you. I will select Raw Material here, and the supplier type, company or individual and I am done! I can add their contact details and address later while editing the complete form.
Recording a Sales Order
Now that I have my basic masters like company, accounts, items, customer and supplier ready, let’s record a couple of sales and purchase transactions here.
Before that, let me introduce you to the Awesome bar! You can use this to search any document that you want to see OR go to any of these modules and navigate from there. Let’s say 20 of my wardrobes have to be sold out to Tranquil Hotels, and now I will create a Sales Order. All I need to do is, search for a Sales Order from the Awesome Bar.
As you can see, there are already a few suggestions, just like Google. Let’s click on the Sales Order List; and there you go, we have the list right here, without even navigating! I will create a New Sales Order from this button. Select the customer and the delivery date. Here below is a table, wherein, I am going to add the Item Code and the quantity; the Item Name and the Rate as defined in the master will be fetched automatically. If needed, I can also add a new Rate. The amount will get updated automatically in both cases.
Tables like these may be present in a lot of other documents as well, and these are called Child Tables. More about the child tables in the next lessons. Let me save this transaction; by default it is stored in Draft mode. Since it is in draft mode, I can still make changes if I want. Once I have submitted the transaction, it cannot be updated. Which is also why ERPNext will actually ask you if you are sure about submitting the transaction. I will click on yes, and here my first Sales Order is ready.
I can now print this Sales Order from this icon, and can also send an email directly from within this transaction.
Generating Invoices and Financial Reports
After creating a Sales Order, you can see that I can also create multiple other transactions from this create button, like Delivery Note, Work Order, Material Request, etc.; I will select Invoice, and fetching the same details as that of the Sales Order, a Sales Invoice will be created automatically. No need of updating the same information in every transaction, ERPNext will do it for you.
Just like a Sales Order, you can take a Print of the Sales Invoice and all the other transactions and record your conversation with the customer from here itself. If you wish, you can also open a new transaction and click on ‘Get Items From’ to fetch the details from other transactions. I have also created a couple of Purchase Invoices that you can see here in this list. Now, based on all of these transactions and Stock Updates, you can see a Profit and Loss Statement. I can also switch to the Balance Sheet or the Cash Flow Statement. So now, even I am doing business on ERPNext!
I just have to record a couple of transactions and all my accounts would be updated automatically!
Conclusion and How to Get Help
If this is not cool, I don’t know what is! Do check out all the other modules in our upcoming videos. Meanwhile, you can go ahead and try to create some masters and transactions yourself, feel free to play with the different modules and domains.
Also, remember that at any given point if you can’t understand something, you can check out our User Manual from here which will give you a detailed understanding of all the masters and transactions. If at all you find it difficult to fetch the documentation on a topic, don’t worry, ERPNext is pretty popular! Just type ERPNext and the name of the document that you wish to understand and voila! You will find it in seconds; unless of course, if you don’t have good network speed then... well... What can I say!
In case you need additional assistance, raise a support ticket anytime from within your ERPNext account. You can also track the Issue status and expected resolution date! Do comment and let us know your thoughts about this video. Hit the bell icon if you wish to know what happens next with Frappe Furniture!